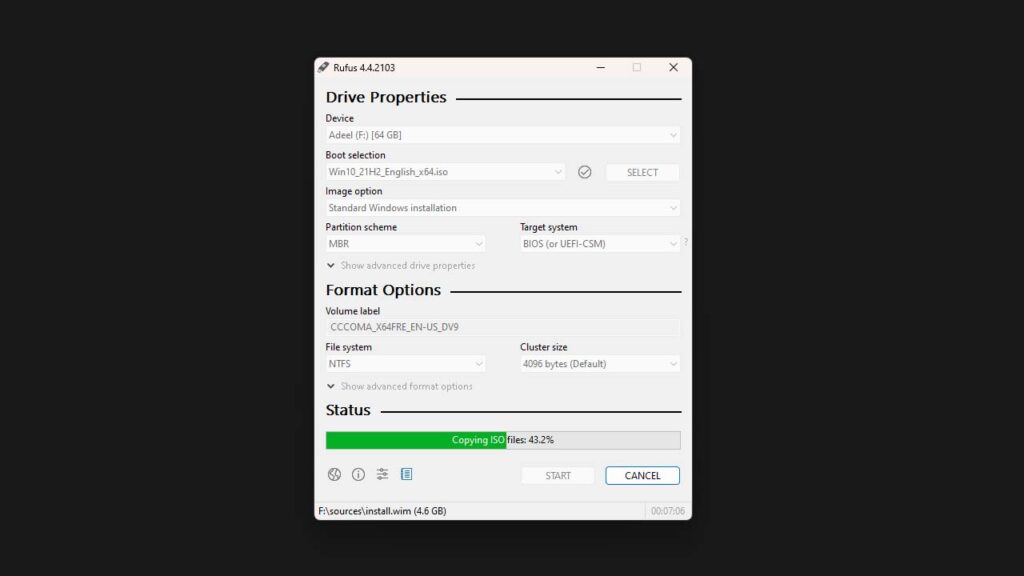
Rufus is a free and open-source utility tool that helps in creating bootable USB drives. It is a popular software that allows users to create bootable USB drives to install various operating systems such as Windows, Linux, and more.
Table of Contents
The software is easy to use and comes with a simple and intuitive interface. It has a small size, making it easy to download and install on any Windows computer. With Rufus, users can quickly and efficiently create bootable USB drives to install their operating system of choice. Whether you’re a professional system administrator, tech enthusiast, or just need to install an operating system on a new computer, Rufus is the perfect tool to help you get the job done.
Rufus Review
Rufus is a highly regarded and widely used utility software that is designed for creating bootable USB drives. It is considered to be a reliable and efficient tool for this purpose and is favored by many users for its simplicity, speed, and accuracy.
Rufus supports a wide range of file systems, including NTFS, FAT32, and others, and can be used to create bootable drives for a variety of operating systems, including Windows, Linux, and others. Additionally, Rufus is regularly updated and improved, ensuring that it remains a top choice for users looking for a reliable and effective bootable USB drive creation tool. Overall, Rufus is highly rated by users and is considered to be one of the best tools available for this purpose.
How to Use Rufus to boot a device?
Using Rufus to boot a device can be done in several simple steps:
- Download and install the latest version of Rufus.
- Connect the device that you want to boot to your computer.
- Launch Rufus and select the device that you want to boot from the “Device” drop-down menu.
- Select the file system and file format for your device. You can choose between MBR and GPT, as well as NTFS, FAT32, and others.
- Choose the boot selection that you need. If you are booting a Windows ISO, select the “Windows” option, otherwise, select “Disk or ISO Image”.
- Load the ISO file by clicking on the “Select” button and browsing to the ISO file’s location.
- In the “Advanced” tab, you can set additional options such as file system label, cluster size, and file system options.
- Finally, click the “Start” button and wait for Rufus to create a bootable USB.
- Once the process is complete, you can then use the bootable USB to boot your device.
Note: Make sure to back up all your important data before using Rufus, as the process may erase all the data on your device.

How to Install Rufus?
Rufus is a popular and widely used tool for creating bootable USB drives, and it can be easily installed on a Windows computer. Here are the steps to install Rufus:
- Download Rufus software.
- Once the download is complete,
- Double-click on the downloaded file to start the installation process.
- A User Account Control prompt will appear asking for permission to run the software. Click on “Yes” to proceed.
- A setup wizard will appear, and you need to follow the instructions to install Rufus on your computer.
- During the installation, you can select the preferred location where you want to install Rufus, or you can leave it to the default location.
- After completing the installation, Rufus will be ready for use, and you can start creating bootable USB drives with the help of this software.
Note: Rufus is a portable software, which means you don’t need to install it, you can simply run it directly from the downloaded file without installation.
Download Section
If you are unable to download Rufus from the above button, you can use mirror download.
FAQ’s
Here are some frequently asked questions:
What is Rufus software?
Rufus is a utility that helps format and create bootable USB flash drives, such as USB keys/pendrives, memory sticks, etc.
How does Rufus work?
Rufus works by formatting your USB drive and then creating a bootable USB drive using an ISO image or other bootable files. It’s known for its speed and reliability in creating bootable USB drives.
Is Rufus free to use?
Yes, Rufus is free and open-source software. You can download and use it without any cost.
What operating systems does Rufus support?
Rufus supports various operating systems, including Windows, Linux, and DOS. It can be used to create bootable drives for Windows installation, Linux distributions, or other bootable utilities.
Is Rufus safe to use?
Yes, Rufus is generally considered safe to use. It is a widely used and reputable software tool for creating bootable USB drives. However, always download Rufus from the official website or trusted sources to avoid potential malware or counterfeit versions.
Can Rufus create bootable drives for macOS?
Rufus primarily focuses on creating bootable drives for Windows, Linux, and DOS. While it may be possible to create a macOS bootable drive with Rufus using certain workarounds, it’s not officially supported.
What are the system requirements for using Rufus?
Rufus has minimal system requirements and can run on most modern Windows PCs. It typically requires a Windows operating system (Windows XP or later) and a USB flash drive.
Can Rufus be used to create bootable drives for gaming consoles?
While Rufus is primarily designed for creating bootable drives for PCs and compatible operating systems, it may not be suitable for creating bootable drives for gaming consoles like PlayStation or Xbox, as these consoles have their own specific requirements and methods for booting.
Does Rufus support UEFI booting?
Yes, Rufus supports both Legacy BIOS and UEFI booting. It offers options to create bootable drives compatible with both BIOS and UEFI systems.
Where can I download Rufus?
Rufus can be downloaded from its official website or from trusted software repositories. Always ensure you download Rufus from a reliable source to avoid counterfeit or modified versions.
Ads by Adsterra


