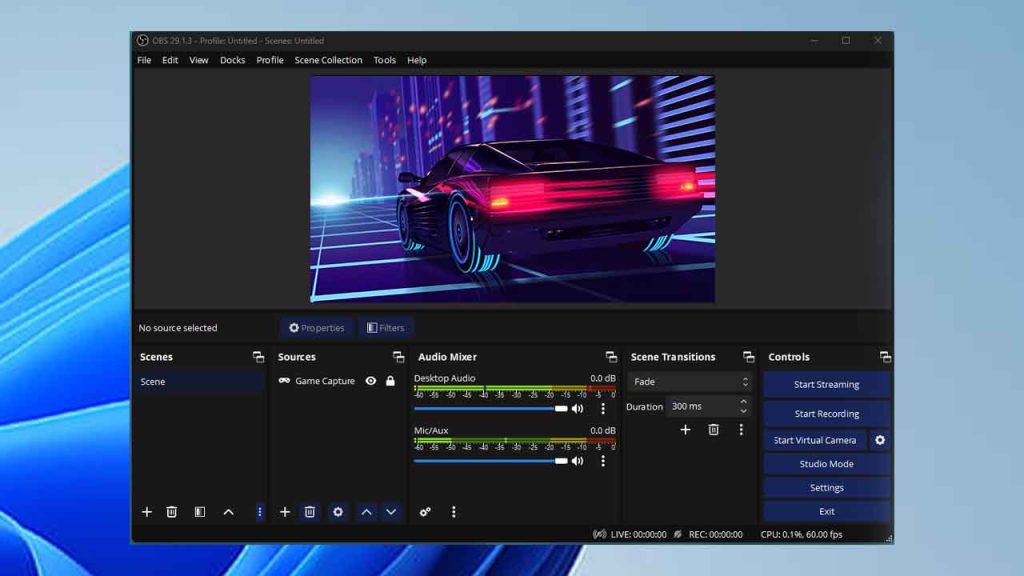
In this guide, we’ll walk through the best OBS Studio settings for AMD users to ensure smooth, professional-quality recordings that capture every detail of your gameplay and crystal-clear microphone audio.
Table of Contents
If you’re using OBS Studio to capture high-quality gameplay and microphone audio, having the right settings can make a huge difference—especially if you’re using an AMD graphics card.
How to Set Up OBS Studio for Gaming on AMD
Learn how to optimise OBS Studio settings for smooth gameplay and clear microphone audio on AMD GPUs. Perfect your recording setup with this quick guide. Here are the steps:
1. Setting Up OBS Studio for Gameplay Recording
Start by opening OBS Studio and navigating to the Settings menu to access the options we’ll be tweaking.
Output Mode: Advanced
To fully access all recording options, set your Output Mode to Advanced. This will unlock settings like encoding, bitrate control, and audio adjustments, allowing for more detailed customisation.
2. Configuring the Video Settings
Encoder
Since you’re using an AMD graphics card, you’ll want to take advantage of the AMD H.265 (HEVC) encoder. This encoder is optimized for high-quality video at smaller file sizes, perfect for recording HD gameplay without massive file sizes.
- Recording Format: Set to MP4 for compatibility with most video editing software.
- Encoder: Select AMD H.265 (HEVC) for optimal recording quality.
- Rescale Output: Leave unchecked unless you need to record at a specific resolution other than your gameplay resolution.
Rate Control
For smooth video quality, CQP (Constant Quality) is recommended.
- CQ Level: Set it to 15. This offers a good balance between video quality and file size. Lower values (10-14) increase quality but also significantly increase file size.
- Preset: Set this to Quality to ensure a clean, detailed recording without compromising performance.
- Keyframe Interval: Leave this at 0 for automatic keyframe placement, which OBS adjusts as needed.
3. Setting Up Audio for Clear Microphone and Game Sound
To capture both game audio and microphone audio in separate tracks, OBS allows us to configure each source individually.
Audio Track
In the Output tab, you’ll find the Audio Track section. Choose Track 1 for game audio and Track 2 for microphone audio, or adjust according to your setup. Setting up separate tracks makes it easier to edit each audio source independently in post-production.
- Audio Encoder: Set this to FFmpeg AAC, which works well with AMD setups.
- Bitrate: For clear audio, choose 160 kbps or 192 kbps. This will give you rich, undistorted sound for both gameplay and mic audio.
4. Audio Mixer Setup
Once the output settings are configured, go to the Audio Mixer in OBS. Here, you can assign audio sources to specific tracks:
- Game/Computer Audio: Select Track 1 for your desktop or gameplay audio.
- Microphone Audio: Select Track 2 to keep microphone audio separate, making it easier to adjust volume or edit out background noise later.
You can find the Audio Mixer at the bottom of the OBS window. Click the gear icon next to each source to open Advanced Audio Properties and check the box for the appropriate track.
5. Optimising Video and Audio Quality in the Advanced Tab
Head to the Advanced tab for a few final tweaks to maximise your recording quality.
- Process Priority: Set this to Above Normal to give OBS more CPU resources, reducing the chance of dropped frames.
- Renderer: Ensure Direct3D 11 is selected, as it’s optimised for most AMD graphics cards.
6. Adjusting Video Settings for High-Quality Gameplay
Under the Video tab, you’ll set the output and base resolutions for your recording.
- Base (Canvas) Resolution: Set this to your screen’s resolution (e.g., 1920×1080).
- Output (Scaled) Resolution: For most recordings, setting this to 1080p (1920×1080) is ideal. If you’re looking for smaller file sizes, you can scale down to 720p (1280×720).
- Downscale Filter: Select Lanczos (36 samples) for the best visual quality during downscaling.
- FPS: Set this to 60 for smooth gameplay recording. If your PC struggles with 60 FPS, drop it to 30 FPS to reduce the load.
7. Running a Test Recording
Now that you’ve set up your OBS Studio settings, run a short test recording to see if any adjustments are needed. Play your game for a minute or two, then review the footage for smoothness, video clarity, and audio balance.
If you notice any lag or quality issues, consider slightly adjusting the CQ Level or Output Resolution to find a balance between performance and quality.
8. Troubleshooting Common Issues
If you encounter common issues like stuttering or audio desynchronisation, here are a few tips:
- Stuttering or Frame Drops: Lower the CQ Level or reduce your Output Resolution slightly. Alternatively, switch the Preset from Quality to Balanced.
- Audio Sync Issues: Make sure all audio devices in OBS are using the same sample rate (found under the Audio tab in Settings). Setting everything to 48 kHz is a good standard for gaming content.
- File Size Too Large: Consider switching to H.264 encoding instead of H.265, as H.265 can sometimes produce larger files on certain setups.
Summary
By following these OBS Studio settings for AMD users, you’ll be able to record high-quality gameplay and microphone audio that’s ready for YouTube or any other platform. Here’s a quick recap of the settings:
- Encoder: AMD H.265 (HEVC)
- Rate Control: CQP with CQ Level 15
- Preset: Quality
- Audio Encoder: FFmpeg AAC with Bitrate at 160-192 kbps
- Resolution: Base 1920×1080, Output 1920×1080 or 1280×720
- FPS: 60 (or 30 if needed)
With these settings, you’ll have clear, smooth recordings that look professional. Now it’s time to hit record, start your game, and let OBS capture everything in pristine quality!


